I have installed Active Directory but client login is too slow?
- Connect the Server to a switch with straight through cable or to another computer with cross-over cable. If a physical layer connection is not detected you cannot run DCPROMO command for AD installation.
- Make sure your OS partition is NTFS. If it is FAT, convert to NTFS using the CONVERT command.
C:\> CONVERT c: /FS:NTFS (assumes that your OS is installed in C drive)
Prepare your Server for AD
This is the details I ‘m using for the setup:
Computer Name : vmw2k
IP Address : 192.168.1.100
Subnet Mask : 255.255.255.0
Default Gateway : 192.168.1.1 (assign your router’s LAN interface IP address here / if you are not sure, leave this field blank for the time being)
Preffered DNS Server: 192.168.1.100
Alternate DNS Server: Leave this blank
- Right-click on ‘My Computer’ icon on desktop and select properties.
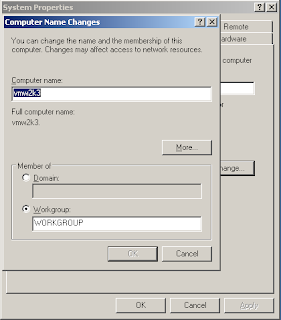
- Select ‘Computer Name’ tab. Click ‘Change’ button.
- Click ‘More’ button.
- Enter ‘mycompany.net’ for ‘Primary DNS suffix of this computer’
- Keep the check box ‘Change primary DNS suffix…’ checked.
- Click OK and restart your computer to accept the changes.
A proper IP address and DNS server setup is required for AD installation. So let’s get started with IP assignment.
- Open Network properties (Start -> Run -> ncpa.cpl -> OK)
- Select Internet Protocol (TCP/IP) and click ‘Properties’
- Set the IP Address and other details as follows:
DNS Server Installation
- Insert the Server 2003 CD
- Open Add or Remove Programs (Start-> Run -> appwiz.cpl -> OK
- Click Add/Remove Windows Components. From the components list, select 'Networking Services' and click 'Details'
- From the Networking Services screen, check 'Domain Name System (DNS)' and click OK
- Click Next to continue the installation (Windows Server 2003 required for this step)
- Click Finish and close Add or Remove Programs
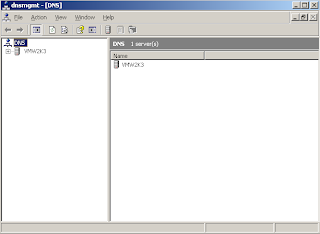
Expand the computer name and select ‘Forward Lookup Zone’
Right-Click on ‘Forward Lookup Zone’ and select ‘New Zone…’ command
Click Next in the ‘Welcome to the new Zone wizard’ dialog.
For zone type, select ‘Primary zone’ option and click Next
For Zone File, accept the default zone name (mycompany.net.dns) and click Next
For Dynamic Update, select ‘Allow both nonsecure and secure dynamic updates’ and click Next
Click Finish.
Now your forward lookup zone is created, you can see ‘mycompany.net’ under ‘Forward Lookup Zone’
Right-Click on ‘Reverse Lookup Zone’ and select ‘New Zone…’ command and click Next
For zone type, select ‘Primary zone’ option and click Next
At the ‘Reverse Lookup zone name’ screen, enter Network ID : 192.168.1 and click Next
For Zone File, accept the default zone name (1.168.192.in-addr.arpa.dns) and click Next
For Dynamic Update, select ‘Allow both nonsecure and secure dynamic updates’ and click Next
Click Finish.
Now our Forward and Reverse Lookup zones are ready. Next we need to create a Host Record for our Domain Controller. For this, right-click on the zone ‘mycompany.net’ and select ‘New Host (A)…’ command.
You will get ‘New Host’ dialog, enter the values as follows:
Name : vmw2k3 (or whatever the name of your server)
IP Address : 192.168.1.100
Check ‘Create associated pointer record’ check box.
Click ‘Add Host’. And click ‘Done’
Refresh both zones, you can see the newly created Host (A) record of your server under Forward Lookup zone and the associated Pointer (PTR) record under Reverse Lookup zone
Verify your DNS installation from Windows command line by pinging with the computer's NETBIOS name (vmw2k3) and Fully Qualified Domain Name (vmw2k3.mycompany.net).
Start -> Run -> CMD -> OK
C:\> PING vmw2k3
C:\> PING vmw2k3.mycompany.net
Both PING commands should resolve Server's IP address to 192.168.1.100 without errors if your DNS setup is correct.
Now check with NSLOOKUP command line tool.
C:\> nslookup
> vmw2k3
> vmw2k3.mycompany.net
>exit
Both NSLOOKUPs should resolve your server's IP address. Now you can continue with AD installation.
Active Directory Installation
Click Next twice
For Domain Controller Type, accept the default option ‘Domain Controller for a new Domain’ and click Next.
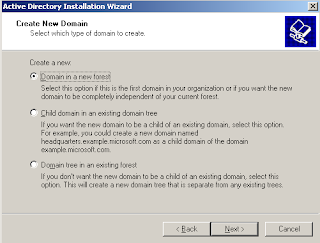
Type of Domain : ‘Domain in a new Forest’. Click Next
For Full DNS Name for new domain, enter ‘mycompany.net’ and click Next
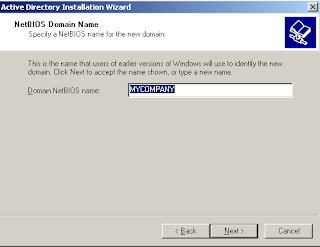
At the screen, DCPromo will search and check whether the netbios name MYCOMPANY already exists on the network. If it not exists, DCPROMO will come up with MYCOMPANY as domain NETBIOS name.
Accept the default Database and Log folder locations and click Next.
Accept the Shared System Volume location and click Next.
If DNS and all other things are fine, you will get a successful message at the diagnostics screen.
Click Next
For Permission, accept the default option.
Enter a password for Directory Service Restore Mode and click Next
Click Next to start the installation
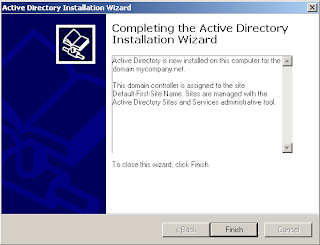
Click Finish to complete the installation
DCPromo will prompt to restart. After the restart you can verify the installation by checking the following things:
i. Right-click on My Computer icon on desktop, select ‘Manage’ command to open Computer Management snap-in. You can see your ‘Local Users and Groups’ disappeared from Computer Management. (It is replaced by Active Directory Users and Computers)
ii) If the installation was successful, you can see the following snap-ins under Start -> Programs -> Administrative Tools
a. Active Directory Users and Computers
b. Active Directory Sites and Services
c. Active Directory Domains and Trusts
DNS and Active Directory is up and running. Now integrate the DNS to Active Directory and accept secure dynamic updates only. For this:
Open DNS management snap-in from Program Files -> Administrative Tools -> DNS
Expand Forward Lookup zone and select 'mycompany.net' zone.
Right-click on 'mycompany.net' and select Properties.
On the General tab, click 'Change' button.
In the 'Change zone type' dialog box, check 'Store zone in Active Directory' check box
Click OK and confirm by clicking 'Yes'.
Select 'Secure only' option for Dynamic updates and click OK.
Expand Reverse Lookup zone and select 'mycompany.net' zone.
Right-click on '192.168.1.x Subnet' zone and select Properties.
Repeat the step 4 to 7
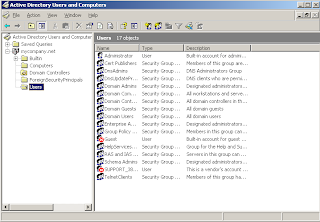
To manage your domain user accounts and computers use Active Directory Users and Computers console.








4 comments:
Thanks a lot
Thank u bijuetta. It helps a lot
Wow....
ഞാന് പഠിപ്പിച്ചതൊന്നും മറന്നില്ല അല്ലേ!! നന്നായി..
thanks..............
Post a Comment